Trying to find math inside everything else

Archive for the ‘labs’ Category

Airport Planning Project

On my flight to San Francisco today, when the pilot mentioned that we have leveled off at our cruising altitude of 32000 feet, we had just passed Scranton, according to the interactive map. This reminded me of a right-triangle trig project I did my first few years, before it was dropped from the Algebra I curriculum.

I first had the idea by doing a Dan Meyer-style textbook problem makeover. When I was looking for trig problems in the textbook I was using, I saw one that was something like this:

A pilot is flying his plane at 5 miles up and starts his descent 300 miles from his destination. What was his angle of descent?

If I were a pilot, what would I need to figure out? Most likely, I would know I need to land at a certain angle – what I would need to determine is when I should start landing my plane. So I turned the problem around. Then I thought, considering what angles we need to climb at, angles we need to land at, and how high up we need to fly, what’s the minimum distance I could get between two airports that have a connecting fight? (Assuming direct paths.) And so and made the following project:

My students had a lot of fun with this project (even if I did get countries named things like Ratchetopia). Things would get tricky sometimes with scale (I think I had them use something like 1 inch = 50 miles), but overall the process went well. However, sometimes it could be paralyzing, having so many choices of where to put the airports.

Sadly, I don’t have any pictures of the projects my students made. (Maybe on my old phone?)

Set Building Game

(For Explore MTBoS Mission #1)

So I came up with this semi-game last year, based on Frank Noschese’s Subversive Lab Grouping activity. My students had already done that activity at the beginning of the year, so they were familiar with the cards and the idea that the groups were not always what they appeared.

This time, I gave each student a badge that had two words on it: one word on the front, and one word on the back. I asked the students to create groups of 3-4 students using either of their two words. After they formed a group, they had to come up with a description of their group that applied to ALL of their members but ONLY to their members.

This was tricky because of the set of words that I chose, which I had displayed at the front of the room. Set Game List.007

Almost any group of 4 you could create would have some errant fifth member that would fit. And I was VERY adamant that they could not have more than 4 people in a group, no matter how much they asked. So the students needed to use set operations to include or exclude other words. For example, if the students were {Arizona, Brooklyn, Georgia, Virginia} they might say “Our group is the set of x such that x is a girl’s name AND x is a location AND x is NOT Asian.”

Often students would give sentences that weren’t quite precise enough, so I (and later other students in the class) would push back. “Wait! China is a girl’s name and a location.” “Okay, so we’ll add ‘AND x is not Asian.” This caused them to think deeply about what the actual definitions of their group were, and to be careful with being precise. If they weren’t precise enough, they would let other words into their group.

After we got the gist, the groups would then either come up with a description and see if the other students could guess their members OR list their members and see if the other students could figure our their description.

Each round, I had the groups write down on an accompanying sheet their group in Roster Notation, Set Builder Notation, and draw a Venn Diagram where they shaded in where their group lies. So through this I introduce the different notation we use, intersections, and complements. (That left only unions and interval notation for the next day.) I also included pictures of 4-way and 5-way Venn diagrams, in case they needed it.

Stuff

Set Cards (pdf – formatted for name-tag size)

Set Game Worksheet (pdf)

Set Game Worksheet (pages)

Trig without Trig

Over the summer I made a Donors Choose page in the hope of getting some clinometers, so that we can go out into the world and use them to calculate the heights of objects like trees and buildings. And we did!
I created the Clinometer Lab as an introduction to Trigonometry. As such, prior to the lab, they had not seen any trig at all. So I started off with this video as the homework from the night before.

In class, we talked about how, when the angle is the same, the ratio of the height and shadow is the same. And how, long ago, mathematicians made huge lists of all of these ratios.
So if they told me any angle, I could tell them the ratio, and then they could just set up the proportion and solve.

So we left the building and went to the park, armed with clinometers, measuring tape, calculators, and INBs, so do some calculations. I had the students get the angles from their eyes to the height of a tree, from two different spots, and the distances, so they could set up a proportion and discover the height of the tree. (When they finished, they did a nearby building. If they finished that too, the extension problem was to switch it up: given the height of a famous building, the Metlife Tower, that they could see from the park, and determine how far away they were.)

Clinometer Park Pic

It went really well, and I think they got the idea. The fact that they could choose which tree to measure and were given free range of the park, and could choose where to stand to look at the top, but always had to come back to me to get their ratio, worked seamlessly. I could check in on them easily and keep them on the right path. (Especially with my co-teacher there to keep them all wrangled, or the AP who observed/helped chaperone the classes without my co-teacher.)

The next class, I revealed to them that I was not using that crazy chart to give them their ratio, but rather they can just get it themselves from the calculator, which basically internalized the list. Then they got it, that is was just ratios and proportions, not some crazy function thing.

Trig as a topic did not go great in my class, but that is the fault of my follow-up lesson, where I tried to squeeze in too much and didn’t do any practice, not that fault of this lesson, which still sticks in their minds. Later in the year we were doing a project about utilizing unused space, so we picked empty lots but couldn’t get in. So in order to figure out how big they were, we used clinometers, and trig. Now that’s a real world application.

The Lab

Clinometer Lab Instructions

Clinometer Lab Sheet

The Archimedes Lab

I love this lab, but I’m sure it can be improved, so I’d love to hear feedback in the comments.

When I was student teaching at Banana Kelly, they had a combined math/science program that often had many lab activities, both math labs and science labs. But I noticed the Systems of Equations unit didn’t really have a lab, so I set out to make one. I created the Archimedes lab because of that.

The story of Archimedes and the Crown of Syracuse says that he was able to determine that the crown was not pure gold by using mass and volume. We start by watching a short video about the story. (I had assigned the video as homework, but no one watched it. While my video homework watching rates aren’t stellar, they’ve never been this bad. I blame the fact that it’s been a while: the last video was in December.)

Then I tell them that we can do Archimedes one better. It’s been over 2000 years since he lived and we have algebra and precise tools on our side: we can figure out exactly how much gold was stolen, not just if some was.

CAM00027

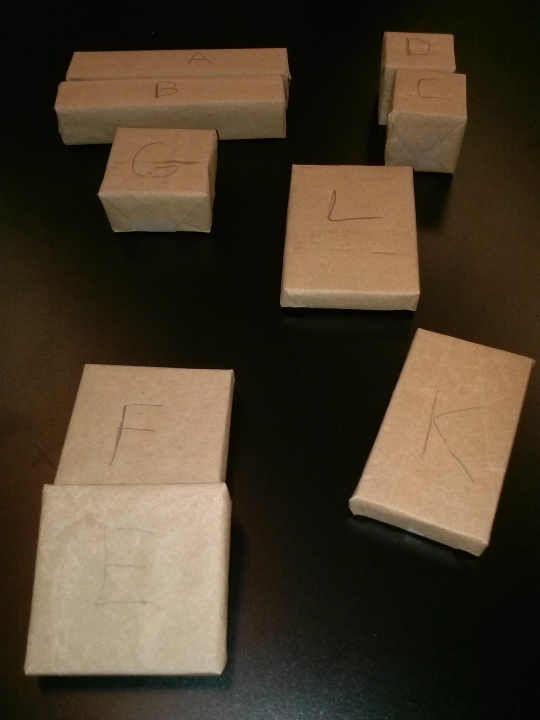
To demonstrate this, we built several Mystery Blocks out of two different materials. Back at BK, we had lots of different materials in the science closet to use. Because the students would know the type of material (brass, aluminum, wood, etc) but not the size and shape, they would have to use density to solve the problem. (But I had seeded the story throughout the whole unit.) The density kit I requested last year never arrived, though, so I had to scrounge around for something, and I found the perfect thing: Cuisinaire Rods.

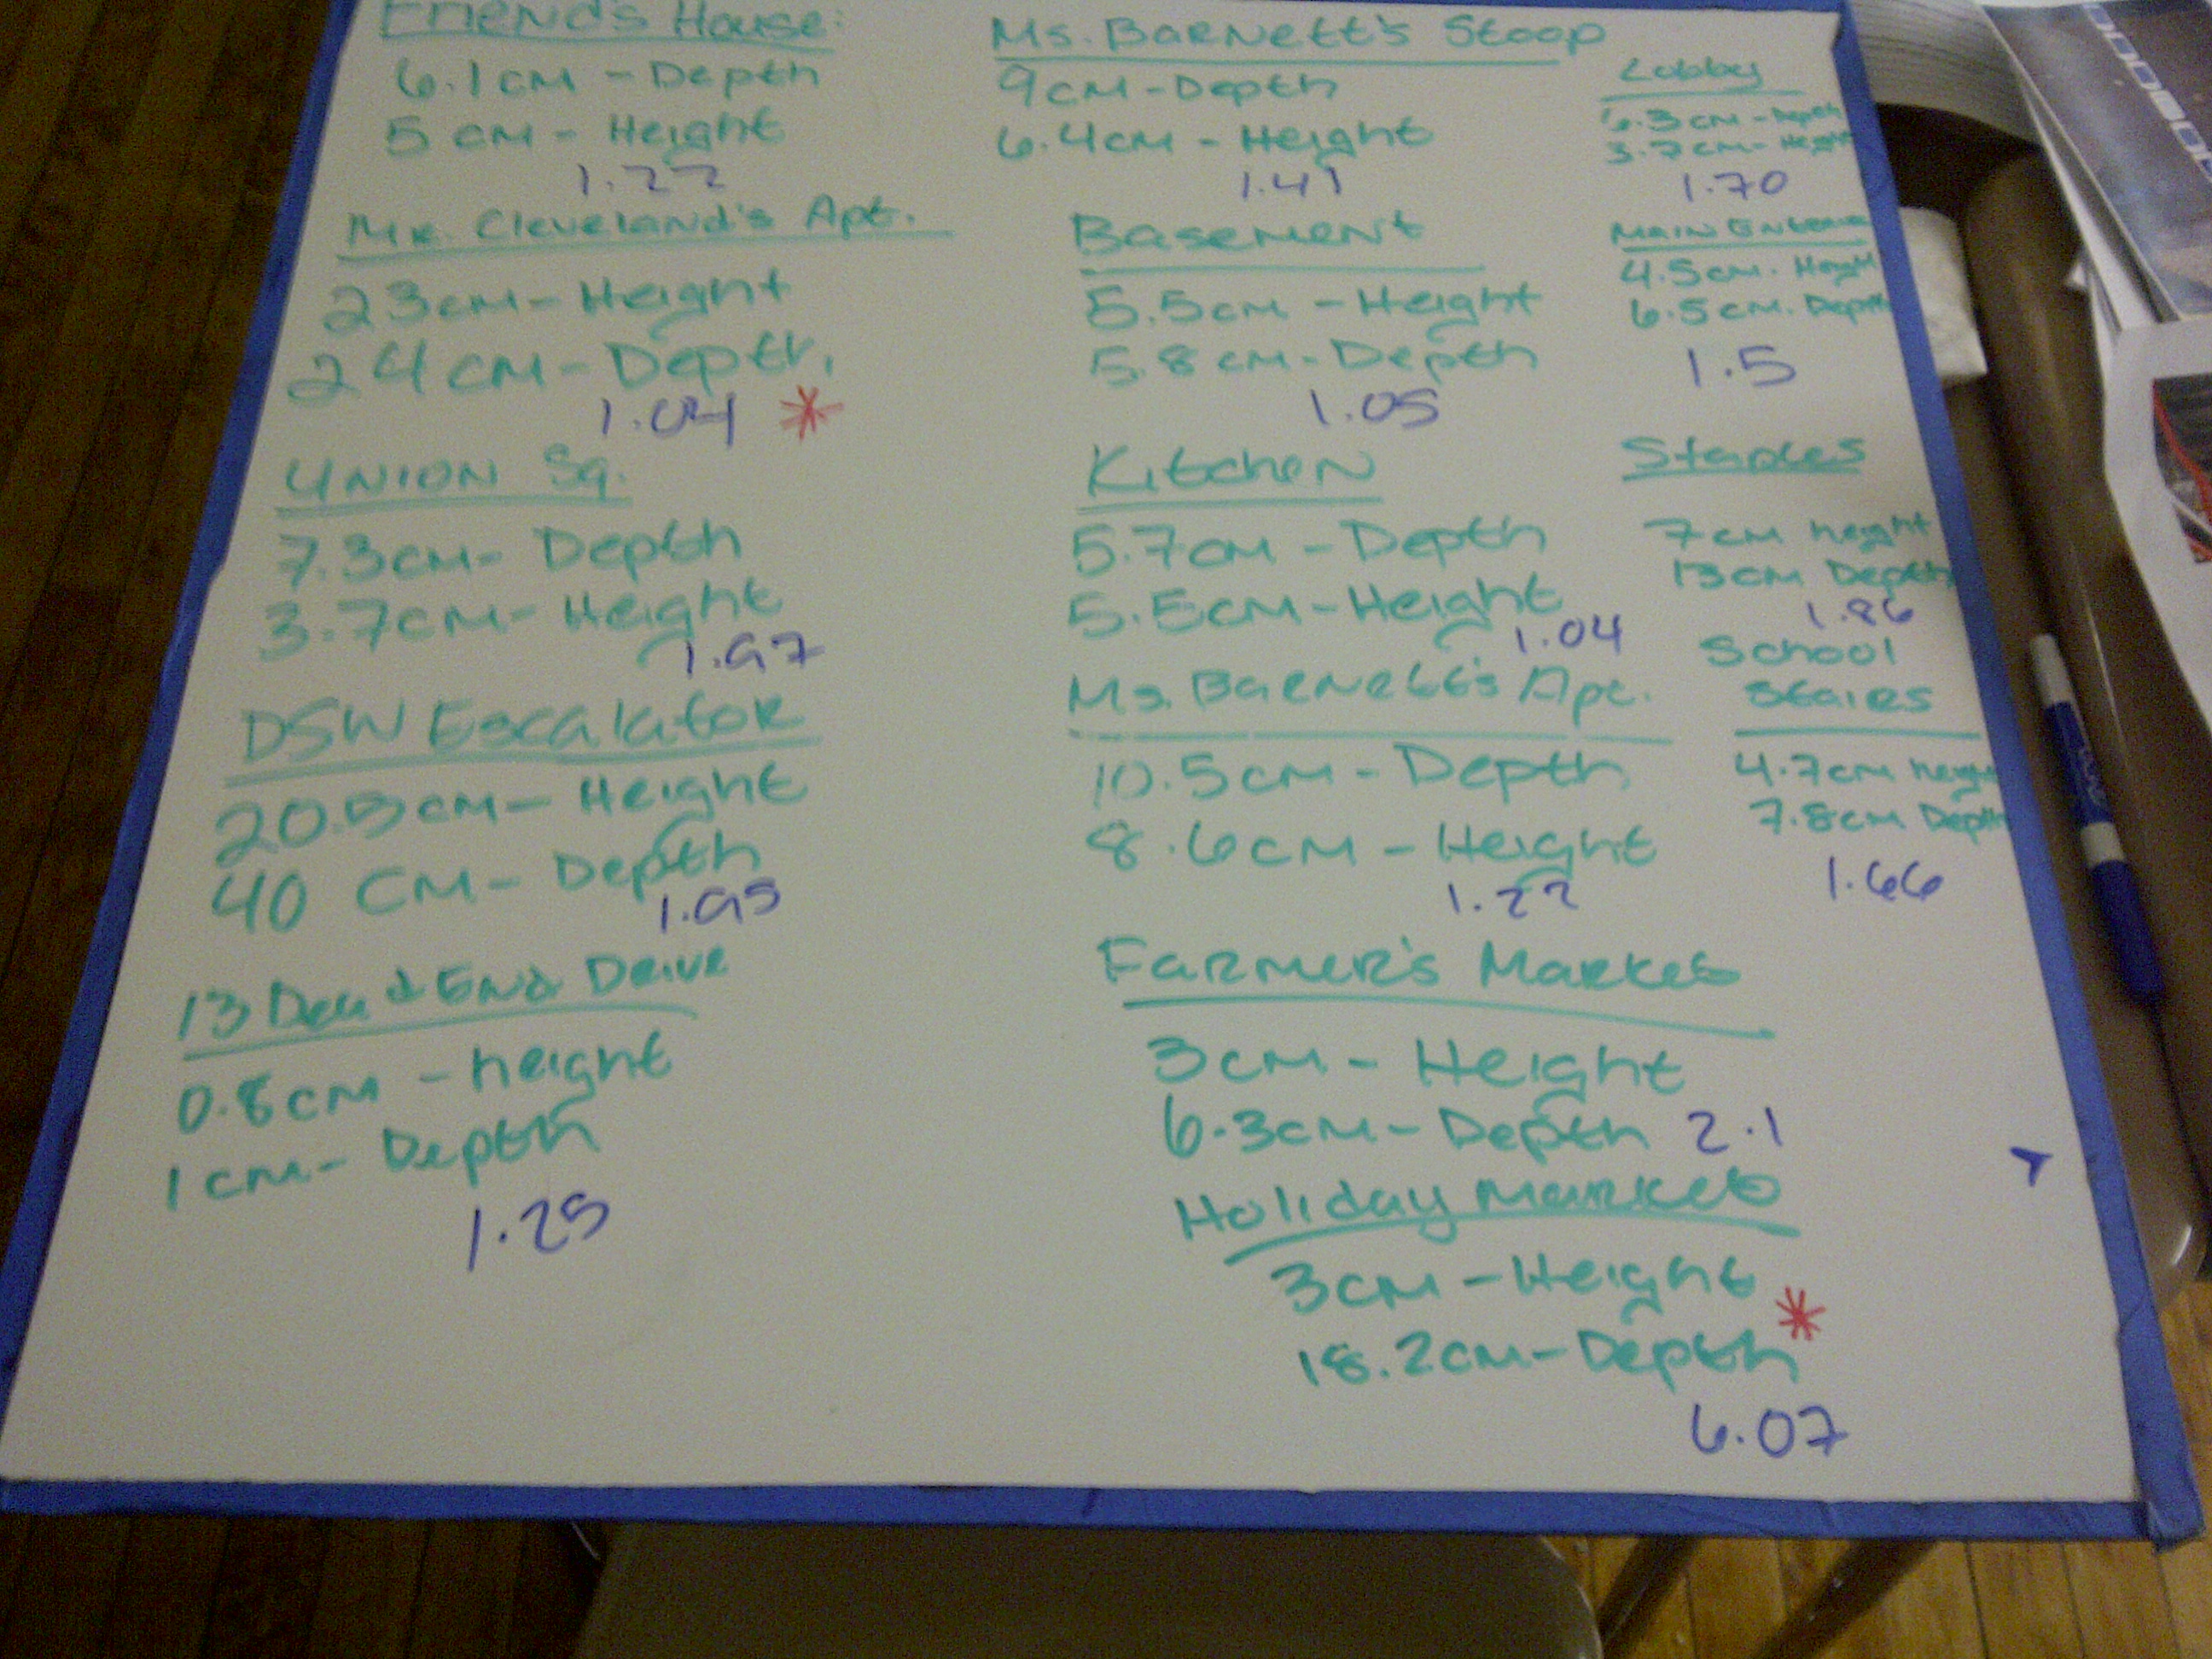
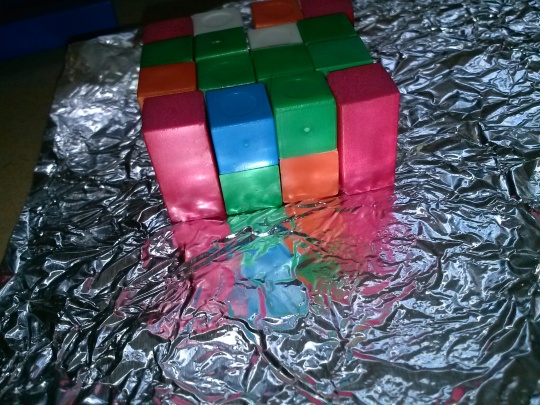
I noticed that, despite what I expected, the longer Cuisinaire rods are much less dense that the small single cubes. So I used some amount of cubes and some amount of rods to make the mystery blocks. Then I simply give the kids one cube, one rod, the block, a scale, and a ruler, and ask them to figure out how many if each kind are in the block.

CAM00024

This lab was much more procedural when I first made it, but I’ve embraced the problem-solving classroom since then. And while my students were unsure of what to do, I feel like we’ve built up to this kind of unstructured problem, and most of them took to it well.

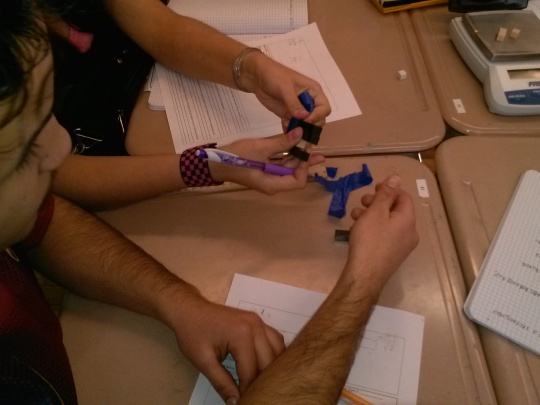
When they thought they had a solution, I would press them on it. “Why do you think it’s 5 yellow blocks and 5 cubes?” If they responded that that matches up in size to the block, I would point out any others do also, like 4 yellow and 10 cubes. I would implore them to use the tools available to them. (We also talked about mass, volume, and density in the warm-up.) If they told me some combination gave them the right mass, I would point out that their volume would be off. If they told me no combination gave them the right volume AND right mass, I would ask why. Most would identify the tape/foil/wrapping paper as the culprit.

Most importantly, if they gave me a solution that was well supported, even if incorrect, I told them there was only one way to find out if they were right: unwrap the mystery block and see. The excitement at each table when they got to that point was palpable. One student said it felt like Christmas. If they were right, they were ecstatic. If they were not, they tried to figure out where they went wrong.

CAM00025

When I first made this lab, I put it at the end of the Systems unit, thinking they would need those tools. Now I have the confidence to put it at the beginning, and let them figure it out. No one used equations explicitly to solve the problem, but they definitely grappled with the idea that two separate constraints need to both be satisfied in order to solve a problem, which is an important understanding for systems.

This post is getting a little long, so I’ll probably split off into another posts with problems I had with the lesson, things that went well, and a call for suggestions. I just wanted to get this out there. It’s been a long time since I’ve blogged, because I’ve had a lot going on in my life. So I want to get back to it.

The Lab Sheet

The Archimedes Lab

Accompanying Graph

Steepest Stairs Redux

Last year I made a lesson about determining the steepest stairs, using pictures my co-teacher and I took and based on an idea from Dan Meyer. It took about a period, and was mostly teacher-led. But after arguments and deep thinking about slope, I wanted to go into the lesson deeper, so I turned it into a lab.

I started the same way, throwing up the (new and improved) opening slide and asking which they thought was the steepest and which was the shallowest.

Screen shot 2012-11-26 at 1.55.16 PM

I really like this new improved one because I took a picture of the toy staircase from the board game 13 Dead End Drive (middle left). Last time, there were overall agreement on the shallowest (the Holiday Market) while there was disagreement on steepest. This time, because the toy was tiny (if not shallow), we had some disagreement there, which really let us tease out some definitions of “steeper” and “shallower.”

Once we had definitions of steeper (which usually came out to something like “closer to vertical” or “at a bigger angle”), I handed out the pictures on a sheet of paper and asked them to develop a method for determine which was steeper, or the steepest. I mentioned coming up with some sort of “steepness grade” (because I thought it would be amusing to throw the word “grade” in there).

So I let them struggle, and come up with what information they had to ask me for, which I would then provide. If I had to do it again, I would also have pictures of the width of each stair, as a distracter, because some kids asked for it. Interestingly, some also asked for the angle, because of our prior experience in the year with the clinometers. I told them I didn’t have the clinometer with me at the time. One kid called me on it, because she knew I had a clinometer app on my iPad. So I told her (truthfully) some of the pictures were taken last year, before I had it.

So I had them come up with their own measures. If they tried to base it off of only height or only depth, I deflected with examples of really tall, really shallow stairs, or really short, really steep stairs. TallShallow

By the end of the classes, students usually came up with one of three different measures: slope, the inverse of slope (depth over height), and grade (that is, slope as a percentage).

IMG-20121127-00127IMG-20121127-00125

So they had to then reason as to why they might prefer height/depth to depth/over. (Their logic: it seems more natural to have bigger numbers be steeper stairs, rather than the other way around.) And so it was that point that I told them this “steepness” grade that they developed was often called “slope” by mathematicians.

At which point, I got a big “Ohhhhhhhhhhh.” Which always makes it worthwhile.

The Materials

Stairs – Portrait

Stairs – Landscape

Steepest Stairs Lab

Fish Populations and Proportions

One of the labs I did back at Banana Kelly was a fish population estimation lab. You may have seen something like it before elsewhere. The idea is to explore proportions and the mark and recapture technique of population estimation.

The gist is this: students have “lakes” filled with “fish” (boxes filled with lima beans). They use a sampling tool to collect a sample of fish and tag them all with stickers. Then they release the fish, mix them up, re-sample, and use proportions to determine the population of the lake. They do it a few times and average, then they count the actual population to see how close they were.

But I was at a BBQ the week before I did this lesson, and I was talking to my friend Rachel, who is a marine biologist. I mentioned the lab, and we talked about what they use tags for. One thing is to track populations over time, so they can determine the changes in populations since each different year has a different tag. I wondered if I could change the lab to include that.

(Rachel also dug up the video that I had students watch the night before. I’ve decide to have a little “flip” in my classroom by having students watch a video before we do a lab and start asking questions, which I can then address in the next class.)
So I thought about how I could change it. It actually took a lot of thinking, jotting things down on the white board, consulting with the living environment teacher to make sure I was on the right track. But I extended it, so now they would do at least 5 different calculations in the process, instead of spending all that time on just one proportion.

Now, students do the first part the same as before. Then, a random sample of fish “die” and are removed from the lake and put side, and a bunch of new fish are “born” by taking them from the bag of beans I had. Then when they took a sample of the new lake, they tagged the new fish (not already tagged) with a different color sticker. Now they had data from both years and could figure out the new population, and the difference from the old population.

Not every group got to the extension, but I think it improved the task overall.

The Materials

Fish Lab Instructions (formatted to fit in an INB)

The Lab Report

Math Labs

When I student taught at Banana Kelly High School, the 9th grade math and science teachers there used a wonderful curriculum called Thinking Math and Science, which they had been developing for about 10 years. Those classes were integrated with math and science together, and so very often the classes were doing labs. But the labs weren’t just science, they just as often had math labs. And I wanted to bring that idea into my own classroom.

I had decided last year that I wanted to introduce new topics with labs, so the students could explore an idea before getting the mathematical language that does with it. When I sat down over the summer with my co-teacher Sarah, we created a template for our math lab reports, taking the steps of the scientific method and putting a mathematical twist on it. Here’s an example of it, using the first lab we did, Pythagorean Theorem in 3D.


The beginning is much the same, asking the driving question that we want to answer. Then, instead of background research, since I want to work with a low barrier of entry and move up, we have “What do you notice?” (thanks @maxmathforum).

The next step is to construct a hypothesis. This is often still relevant with math, of course, and may go unchanged for some labs. But I thought another way we could look at a hypothesis is an estimate, since both are educated guesses, right? I set it up using Dan Meyer’s suggestion of “too low, too high, actual guess,” which gives us nice bounds, and I think this does it visually as well. Although not completely, since some students haven’t gotten it, so I wonder if I can improve on that. (I have two versions in the file: the arrow one is the one I used, and the dotted line one is a new idea I have, I’ll try it soon.)

Then we do our calculations, which is our experiment, they go hand in hand. And finally we analyze what we did with discussion questions.

I’m don’t think the format/template is perfect, but I think it’s a start.

Lab –> Lecture –> Assessment

Next year, the weekly schedule at my school is going to be 2 double periods for a particular class (alternating sections on an A/B day schedule) with a single period for every section on Wednesday. Because of the new schedule, I wanted to make a new structure for my class, which is the title of this post: Lab –> Lecture –> Assessment.

There are roughly 30 proper weeks of learning in the year, so I figured I would have 30 Learning Goals to cover, and do one each week. I would introduce each learning goal with a “math lab,” which may be an actual lab (like the popular M&M Lab for exponential growth/decay) or a 3 Act problem or something else that the students can really engage in before getting down to the nitty-gritty and symbolic way mathematicians deal with the problem.

The next double wouldn’t necessarily just be lecture, but it would be the abstraction of what we did the lesson before, including lecturing on technique and practicing what we’ve learned. Then assessment could be any number of things, but will almost certainly involve a targeted quiz.

Seems like a good structure, right? Problem is, while I have a lot of good labs and problems for most of the topics (and will keep improving), not all of them do. Particularly:

  1. Radicals – Simplifying & Arithmetic
  2. Unit Conversion
  3. Solving in Terms Of
  4. Box-and-Whisker Plots / Percentiles
  5. Scientific Notation
  6. Statistics Vocabulary (univariate/bivariate, etc.)


So my major goal this summer will be to develop something for each of those. The rest I can fall back on what I have, even if I don’t come up with something new/better. But these have nothing. My first task/idea is to develop a board game about radicals. That’s still under development. Any other suggestions would be appreciated.

Scaling

Today’s Unshelved gave me an idea for a possible Living Environment-connected lesson I can do in the new year. Surprisingly, though most people think Math and Science go hand in hand, I have a much harder time connecting Living Environment to math than with ELA or History. (Maybe this XKCD comic explains why I have an easier time with Physics and Chemistry.)

During my statistics unit this past year I did a lesson on scaling and how area and volume scale proportionally to the square and cube of the length. I did it during the statistics unit because it was based on how improper scaling is used to mislead people. (My unit was based on the book “How to Lie with Statistics.”) Of course, where the lesson lies may change based on the curriculum overhaul I do this summer, but I imagine the basics will be the same.

I ran the lesson as a lab, with students building letters out of blocks and then scaling them upwards by factors of 2, 3, 4, and seeing what happens to the area of a trace and the volume (number of 1 cm^3 blocks needed). It was a fine lesson, but I wonder if I can’t improve it with a little more…wonder.

I want to see if I can find a good picture or video of a giant creature like mentioned in the Unshelved post and see if I can get students to wonder if it can exist. That sort of question can give purpose to the scaling exploration in the lab. If you read this and can offer assistance, great. Expect a post in the future based on what I find.